Setting Up Campaigns and Automation
Once you've uploaded all contacts to your Get Reviews account, you can run multiple campaigns to send out communications to your patients. You can create two types of campaigns:
Automated Campaigns: An automation is set up to send email or texts automatically. The automation can be triggered either by adding a new subscriber to your dashboard, or by connecting with your EMR software to send after a patient has visited your office. The automation runs without an end date.
Manual Campaigns: A campaign allows you to manually select a group of contacts to text or email. The campaign ends once requests have been sent to the selected group.
Creating an Automated Campaign
- Click on the 'Campaigns' tab on the left navigation.
- On the new page, click on the 'Create automation' button.
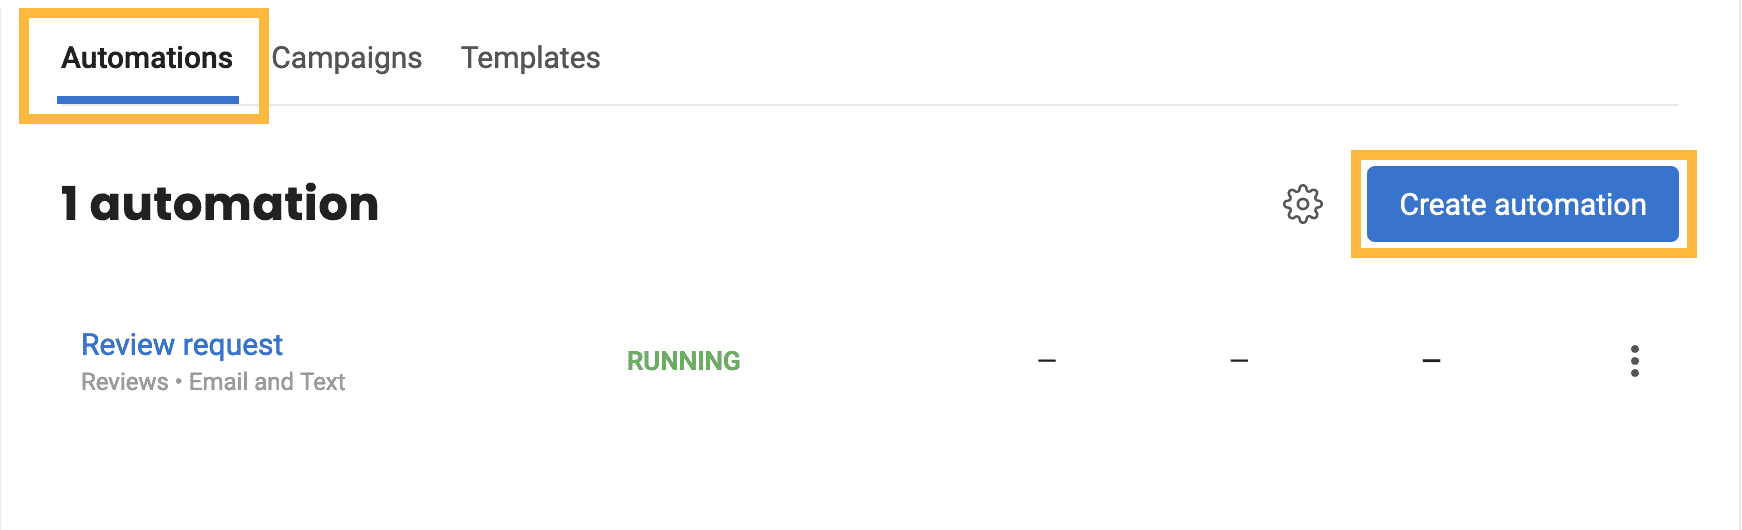
- From the options menu, choose the automation type: 'Custom', 'Review', 'Referral', 'Survey', or 'Customer experience.' (We'll use a Review campaign for our example here).
- On the next screen, give your automation a name using the pencil icon next to the default title.
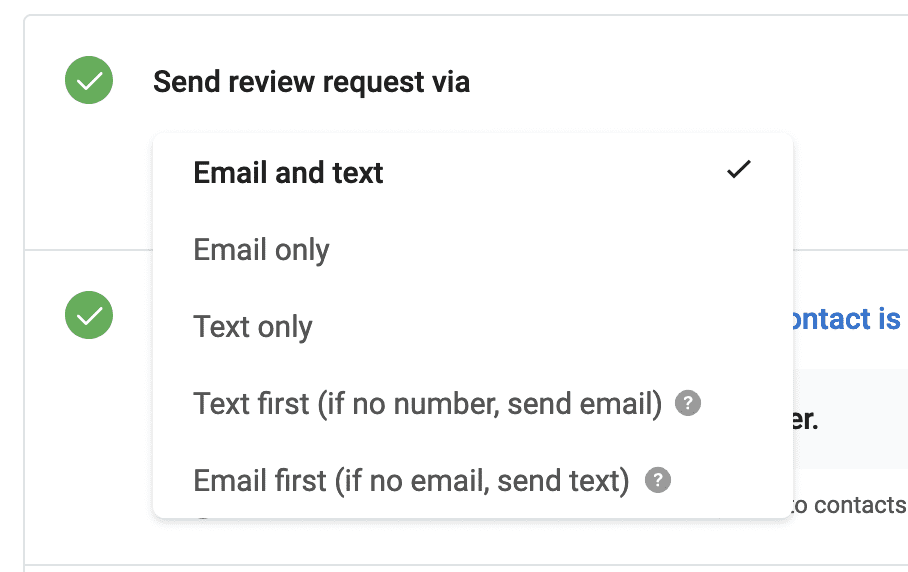
- Select the option for how your campaign should be sent (email, text, both, etc.)

-
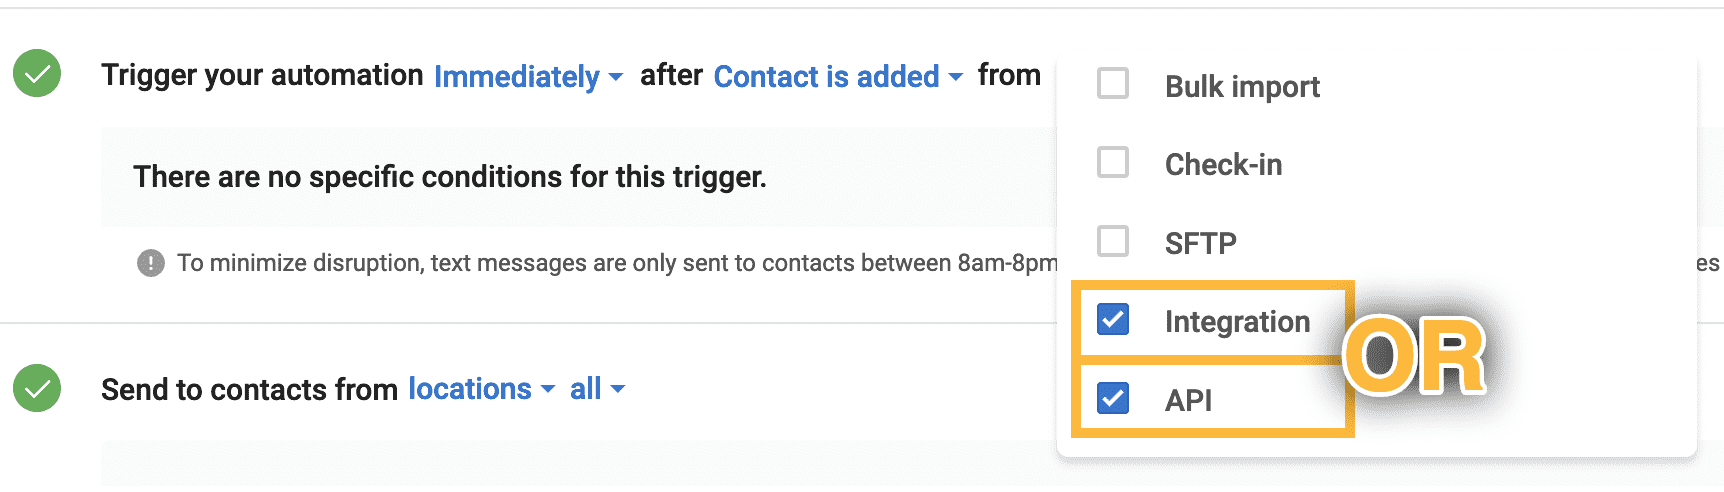
Next, you'll select your trigger options. Use the dropdown selections to choose whether you'd like to send the message immediately or with a customized delay. Leave the second option set to "after Contact is added."
In the third dropdown, select "API" if you want the message to send after a Subscriber is added to your dashboard
- OR select "Integration" if you've confirmed we can integrate with your EMR and want the message sent after someone has come in for their appointment.
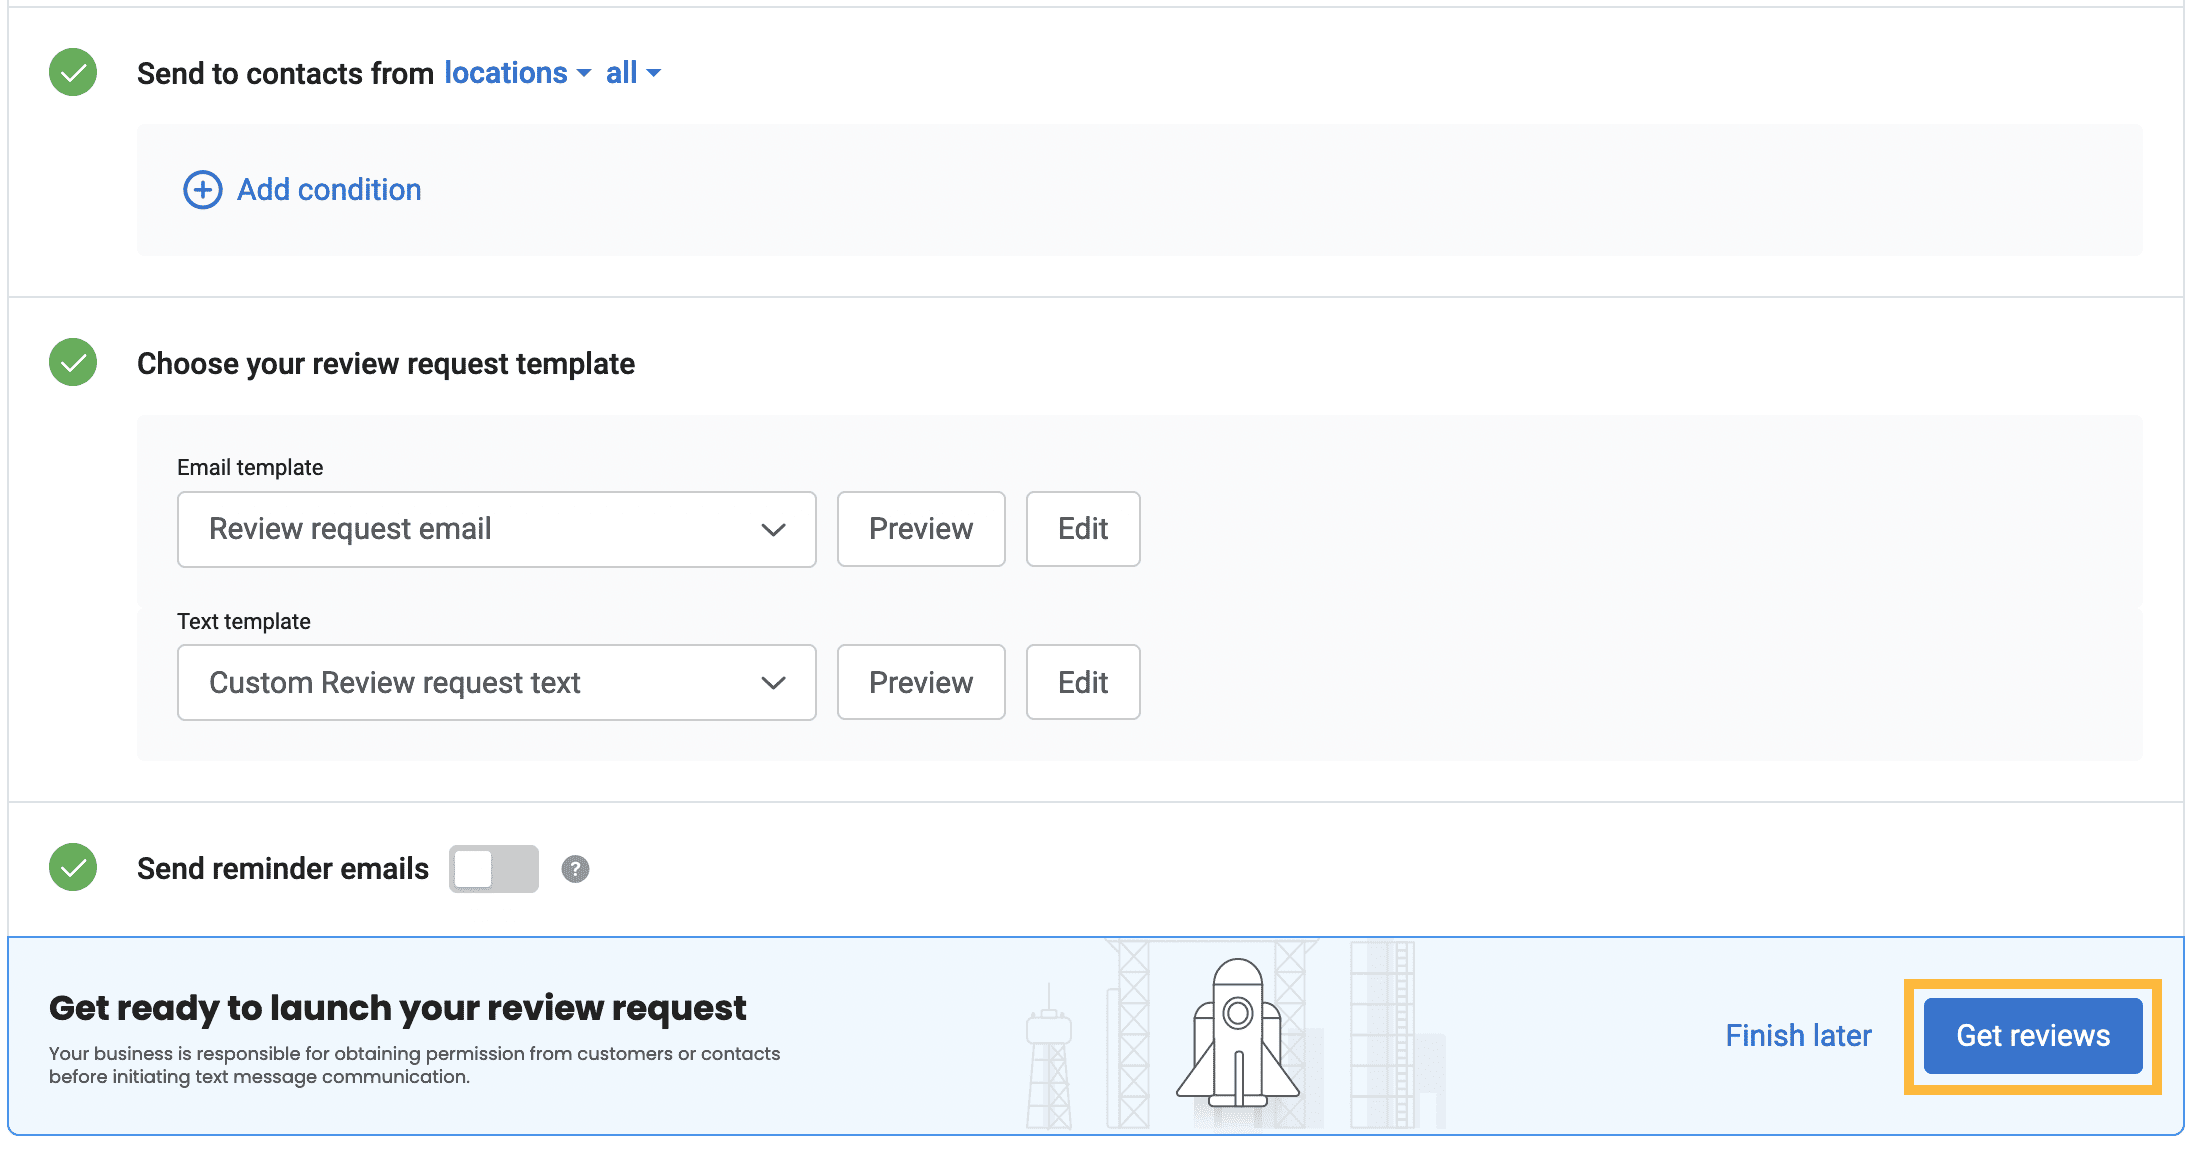
- Continue down the page selecting your template and follow up options. If you're using Get Reviews for multiple locations, there are also location options available.
(Note: Follow up emails are only available if you've selected 'Email' as one of your campaign contact methods.)
- Click the blue 'Get reviews' button on the bottom right to save your automation. It will start running right away.
- Click on the 'Campaigns' tab on the left navigation.
- On the new page, click the 'Campaigns' tab at the top and then 'Create campaign' button on the right.
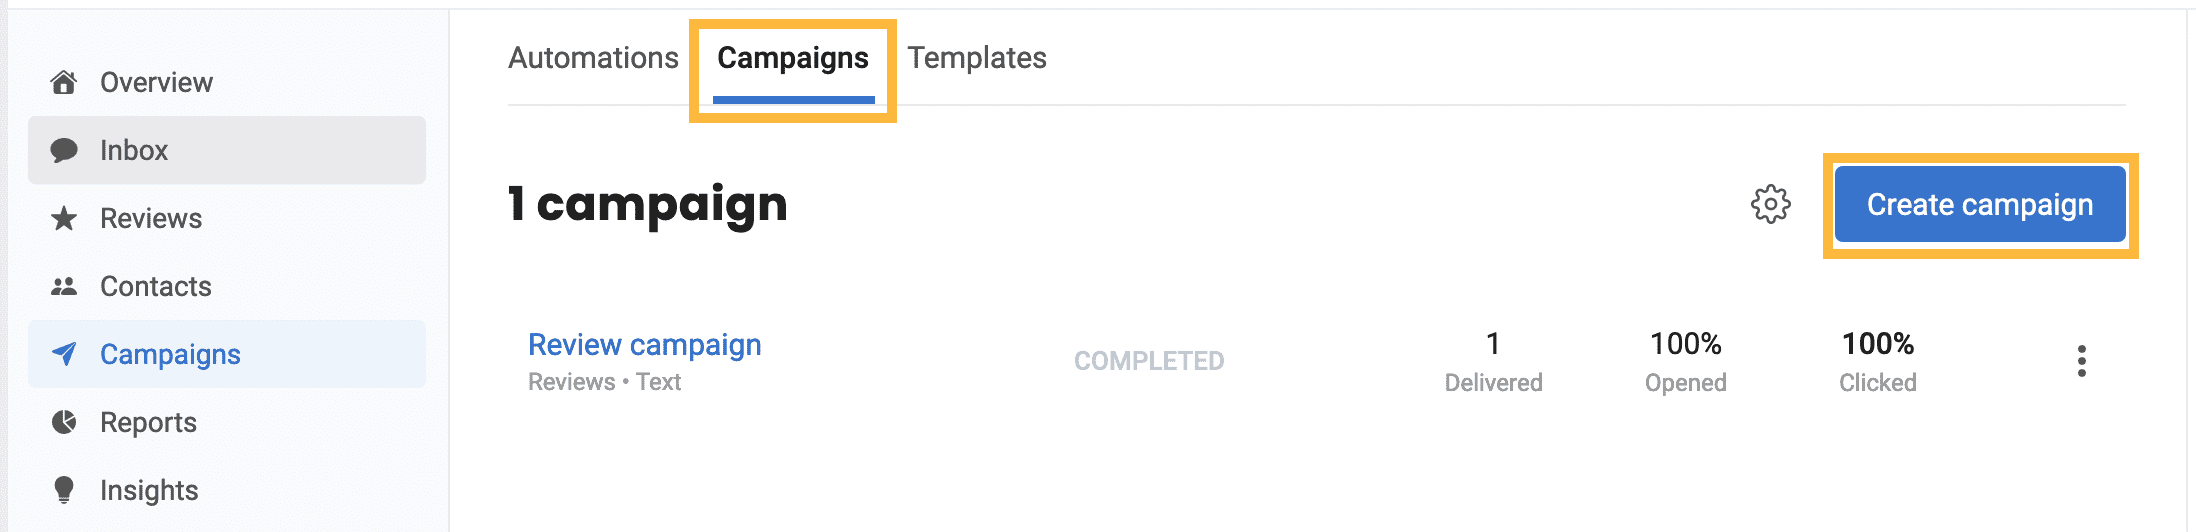
- From the options menu, choose the automation type: 'Custom', 'Reviews', or 'Customer experience.' (We'll use a Review campaign for our example here).
- On the next screen, give your automation a name using the pencil icon next to the default title.
- Select the option for how your campaign should be sent (email, text, both, etc.)
- Next click on the 'Choose recipients' button to select who will receive this campaign. You can select them manually, or use the filters on the left to find certain groups. Once you've selected everyone you want, click the blue 'Select' button on the top right.
- Continue down the page selecting your template and follow up options.
(Note: Follow up emails are only available if you've selected 'Email' as one of your campaign contact methods.)
- Click the blue 'Get reviews' button on the bottom right to save your campaign. It will start running right away.
If you set up an email campaign, the 'From' email address will default to no-reply@get.local-reviews.com. If you'd like to use a business email address, follow these steps:
- In your Reviews dashboard, navigate to Settings > Profile box > Business Profiles.
- Click on the location for which you want to set up the custom campaign replay email address.
- Click the pencil icon in the top right corner to add or edit an email address for your business.
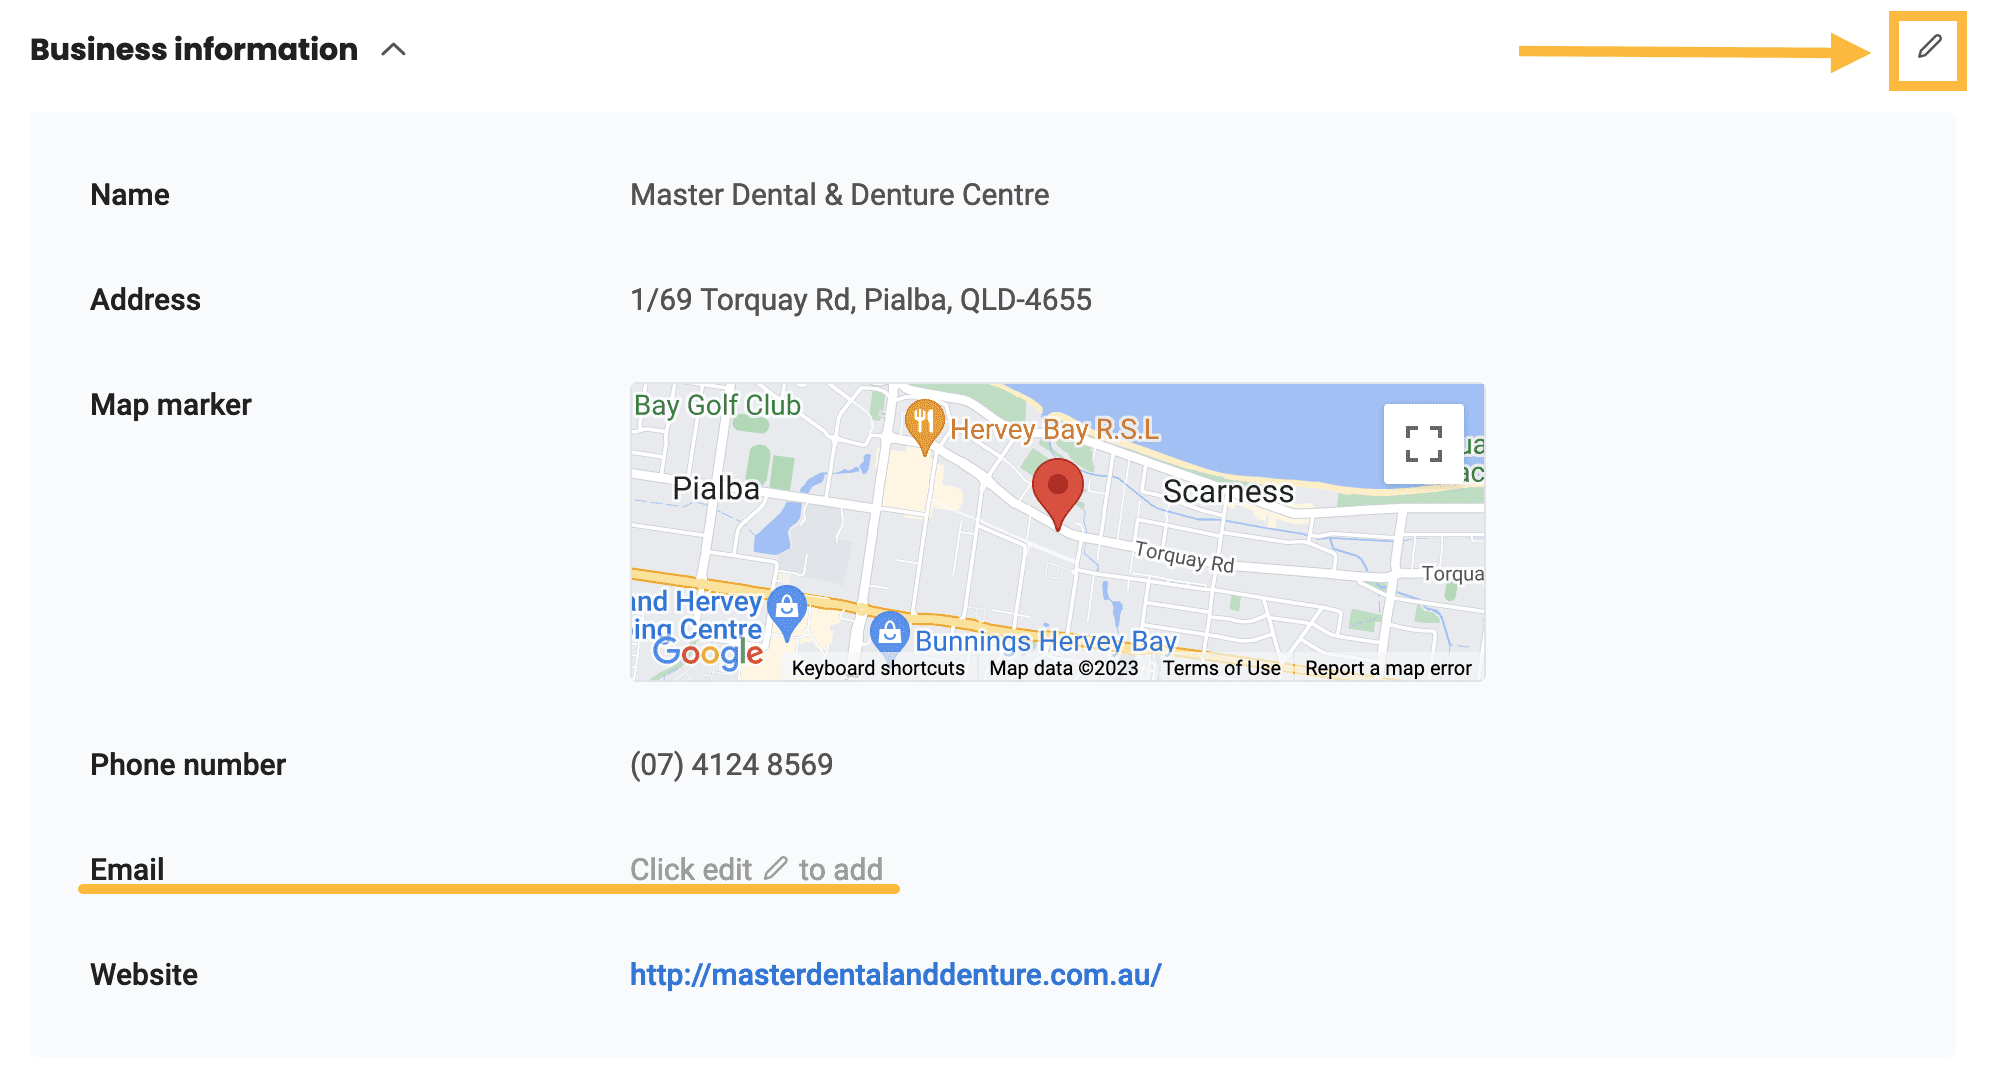
- On the next screen, add your email address and then click 'Save' in the top right corner.
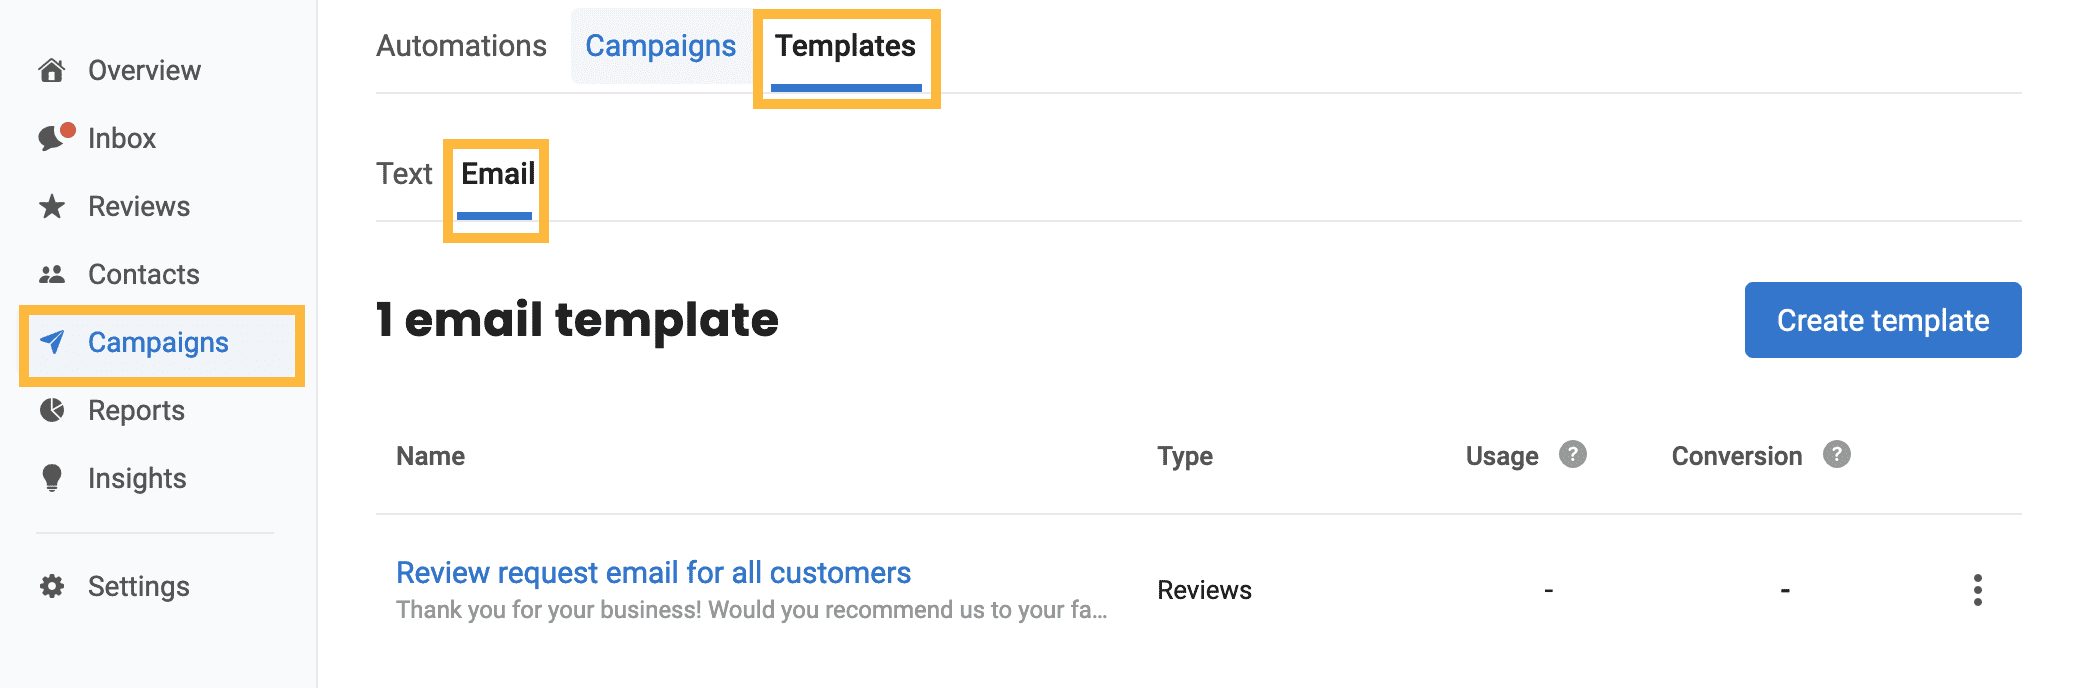
- In the left sidebar, navigate to 'Campaigns', then click the 'Templates' tab, then click the 'Email' sub-tab.
- Click on the template for which you want to edit the reply email address. In the template, select the radio button for 'Business location's email address'.
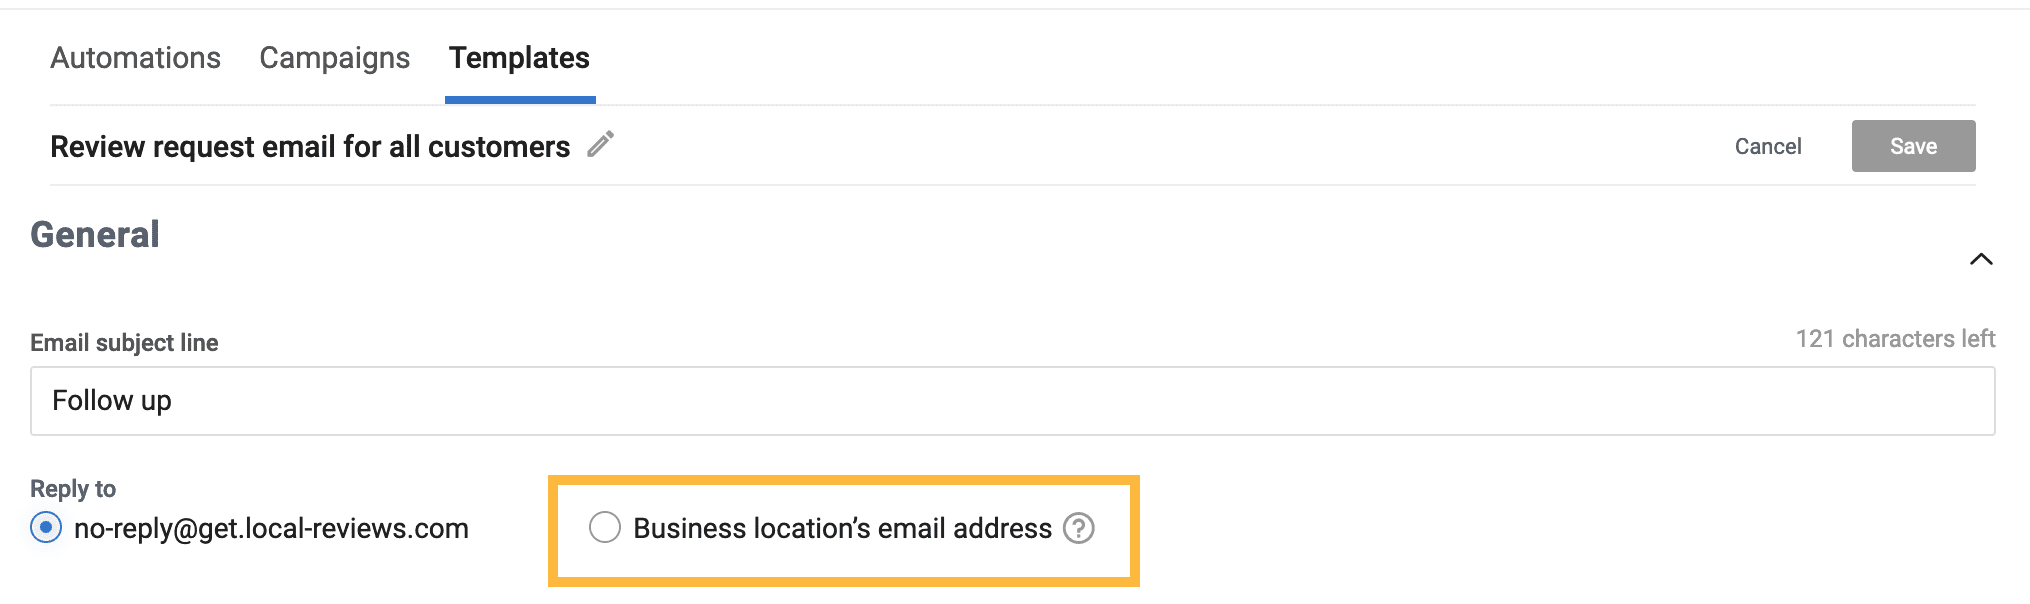
- Click 'Save'.
Get Reviews is able to integrate with many practice management softwares. This integration allows Get Reviews to see that a patient has successfully attended their appointment, and will trigger a review request to be sent afterwards.
For patient security and compliance reasons, Get Reviews does not see any other information within your practice software other than patient contact info, and that they kept their appointment.
If you want to integrate with your practice software, first we'll check to ensure your software allows this connection. If so, our team will schedule a time for you and our expert Get Reviews engineer to get on a call and complete the connection together.