Get Reviews Setup Guide
 Your Get Reviews subscription offers all the tools you need to bring in more reviews for your practice, and be the responsive type of business that patients rave about. This guide will walk you through setting up all the pieces you need to start using Get Reviews right away!
Step 1: Join us for an onboarding call
When you sign up for Get Reviews, we'll reach out to set up your onboarding call. Our team will help you get all your necessary settings in place, including:
- Connecting your social accounts
- Starting the initial upload of your contact list
- Initiating your first review campaign
- Setting up auto sharing of your reviews on social media and your website, according to your preferences
- Setting up auto review replies, if you want
- Setting up your landline as a texting number, if you want
After your onboarding call, all the basics should be in place to start bringing in a steady stream of new reviews. If you just want to sit back and wait for the reviews to come in then, great! You're all set!
But if you prefer to dive in and see all the Get Reviews features, here are a couple places we recommend starting.
Step 2: Explore your inbox
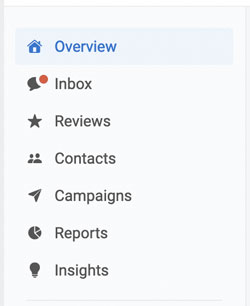 Navigate to your Inbox in the left hand column in your Reviews dashboard. A red dot indicates you have unread messages. Your Inbox pulls in messages from multiple sources, including:
- Texts
- Incoming reviews
- Facebook/Instagram Messenger*
- Google Messages*
- Voicemails left via Receptionist feature
- The Get Reviews Webchat feature (available as an add-on)
*Requires social connection
All messages are sorted by the contact, so communication from all sources for an individual is available to you in one spot. Take a look around the Inbox to see everything you can do, and check out our Inbox resource for more in-depth help.
Step 3: Review your response templates
During your Get Reviews kickoff call, we'll help you set up auto-responses for incoming reviews, if you want. These auto-responses use templates that have already been created for you, but you can also create your own templates to use. Templates can also be selected manually if you prefer not to use the auto-response feature.
To view, edit, and create response templates:
- In your Get Reviews dashboard, click on Settings
- Scroll down to Reviews, and click "Response templates"
- Click on any existing template to edit it
- Click the blue "Create template" button in the top right corner to add a new one
- Use the "personalize" drop down in the bottom right of the text field to add dynamic text, such as the reviewer's name
- Don't forget to save your changes!
If you are using your templates in auto-responses, make sure any new templates are added to your auto-response rules. Here's how:
- Click on Settings
- Scroll down to Reviews, and click "Auto-reply rules"
- Click the rule you want to edit or create a new one
- Follow the prompts to pull in your new template based on whatever parameters you choose
Eager to explore more?
Check out our in-depth resources on all your Get Reviews features.
Review Campaigns
- Setting up campaigns and automation
- Customize your email or text message
- Automatically send follow up reminder emails
- Pause or permanently delete a campaign
- Monitor your campaign's performance
Review Monitoring and Response
Review Sharing
Inbox
- Inbox overview
- Replying to messages and reviews
- Organizing your Inbox
- Optional Webchat add-on
Insights
Texting and phone line options
- Receptionist Features
- Setting up your landline number for texts
Account Information
- Adding Reviews dashboard users
- Adding Employees
- Adding additional locations
- Updating email and text branding