

If you have a personal Facebook account, you can easily create a business page for your practice. And you can do so in a matter of minutes.
Of course, creating a Facebook page and creating a great Facebook page are two very different things. While you don’t need a fancy designer or programming expert, there are some key ingredients needed to build a dental Facebook page that current and prospective patients will enjoy.
Below, you’ll learn about these ingredients in five simple steps.
![]()
1. Create Your Dental Facebook Page
 To get started, visit Facebook’s business page creator. You will begin by choosing the category of your page. As a dental practice, you’ll want to choose the first option: “Local Business or Place.” This leads you to add basic information about your practice (address, city, phone number, etc.). Make sure your information exactly matches what you have on your website and other business directories.
You will then be asked for an official name for your page. This shouldn’t be taken lightly. Not only will it be the official name of your page, it also determines your account URL.
Note: Generically-named pages, or ones that are stuffed with too many keywords, may appear spammy and unprofessional.
2. Complete Basic Information
Next, Facebook walks you through four sections that outline the fundamental aspects of your page. First is the “About” section. This is a brief introduction of your practice. It will be featured on your About page, so make sure it is descriptive, compelling, and succinct.
The About page should differentiate your “brand,” persuading potential followers why they should choose you as their dentist. Also, be sure to include a link to your website. Social media has limitations, so the goal is to get followers to visit your practice website.
After all, your website is the hub of all your online marketing efforts. Your Facebook page is merely an extension.
3. Inject Visuals
 To capture users’ attentions on your dental Facebook page, it’s important to have impressive visuals. This includes having a clean and professional cover photo and profile photo. Your profile photo is the smaller image that appears on your Facebook page, and it is your avatar on all of your published posts. For branding purposes, it’s best to use your logo (or if you are a single doctor practice, you can use your headshot) as your profile photo.
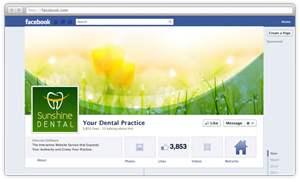
Next, you’ll need to upload a cover photo. This is a large rectangular photo that spreads across the top of your Facebook page. It should capture users’ attention and lure them to take a closer look at your content and practice information.
Take a look at the homepage of your practice website and try to replicate a similar look and feel on your Facebook cover photo. Maintaining a similar vibe on all your marketing channels will enhance your branding.
Here are the ideal dimensions for Facebook photos:
- Profile photo: 400 x 400 px
- Cover photo: 828 x 315 px
- Shared images: 1200 x 900 px
4. Understand the Admin Panel
The basic skeleton of your page is now live. Before you get too far into your dental Facebook marketing endeavors, you should have a basic understanding of the admin panel. The admin panel is a place for you to check notifications, view messages, measure analytics, and make changes to your profile.
At the top of your Facebook Business page you will see five tabs:
- Page: Takes you back to your main page.
- Messages: Allows you to view and respond to messages.
- Notifications: Shows activity on your page, such as comments, post shares, post likes, and page likes.
- Insights: Provides page analytics on views, likes, engagement and other metrics, based on a specified date range.
- Publishing Tools: Shows analytics on individual posts, such as how many people viewed each post and how many took an action.
To the right of these five tabs, you will see a Settings tab. Below are a few settings to take note of:
- Edit Page: Allows you to configure the tabs that appear on the left menu of your page.
- Notifications: Allows you to customize when and how you’d like to receive activity alerts.
- Page Roles: Whether or not you’ll be the main administrator of your page, there may be others in your practice who need access. In this setting, you can invite staff members to monitor and make changes to your page.
5. Create Content
 Once you’ve polished off your Facebook page, it’s time to start creating useful content that your ideal patients will enjoy. When posting on your page, be sure to use a variety of content. What images would your patients to like to see? What stats would they like to read? Building a weekly social media calendar is a great place to start.
Here is what a typical week might look like:
- Monday: Inspirational quote
- Tuesday: Link to one of your newly-published blog posts
- Wednesday: Tip about improving your oral health
- Thursday: Reminder to schedule your next cleaning
- Friday: Funny dental photo
Remember, to make your content stand out be sure to add a photo to each new post you publish.
Visual content attracts 94 percent more views than text-based content and is 40 times more likely to get shared.